
Practical example: your first show
Prepare two colour groups and a scheduled show for 170 RGB pixels.
Prerequisite: Start with output disabled and a separate new test project. Suitable hardware and a licence are needed for the hardware test.
Ready-to-use example projects
Download the file. In Studio, use File → Open to open it. If you download the ZIP, extract it to a folder first. Requires Windows Studio 0.29.0 or later. No external media files are needed.
- Two groups across 170 pixels — download .psl
A1: the first 50 pixels are red and the remaining 120 are green. A2: the colours are reversed. A3: the entire scene is blue.
- 30-second timeline — download .psl
Three populated slots, three 10-second segments and looping. Select the timeline and press Play.
The example nodes are disabled and use loopback addresses. In the scheduling example, the master switch and all rules are disabled. Use Save As to keep your own experiments.
Step-by-step instructions
In a new project, remove the starter fixtures and create a single 170×1 RGB strip. Set the starting universe to 1 and the channel to 1, then save as Egitim-170.psl.
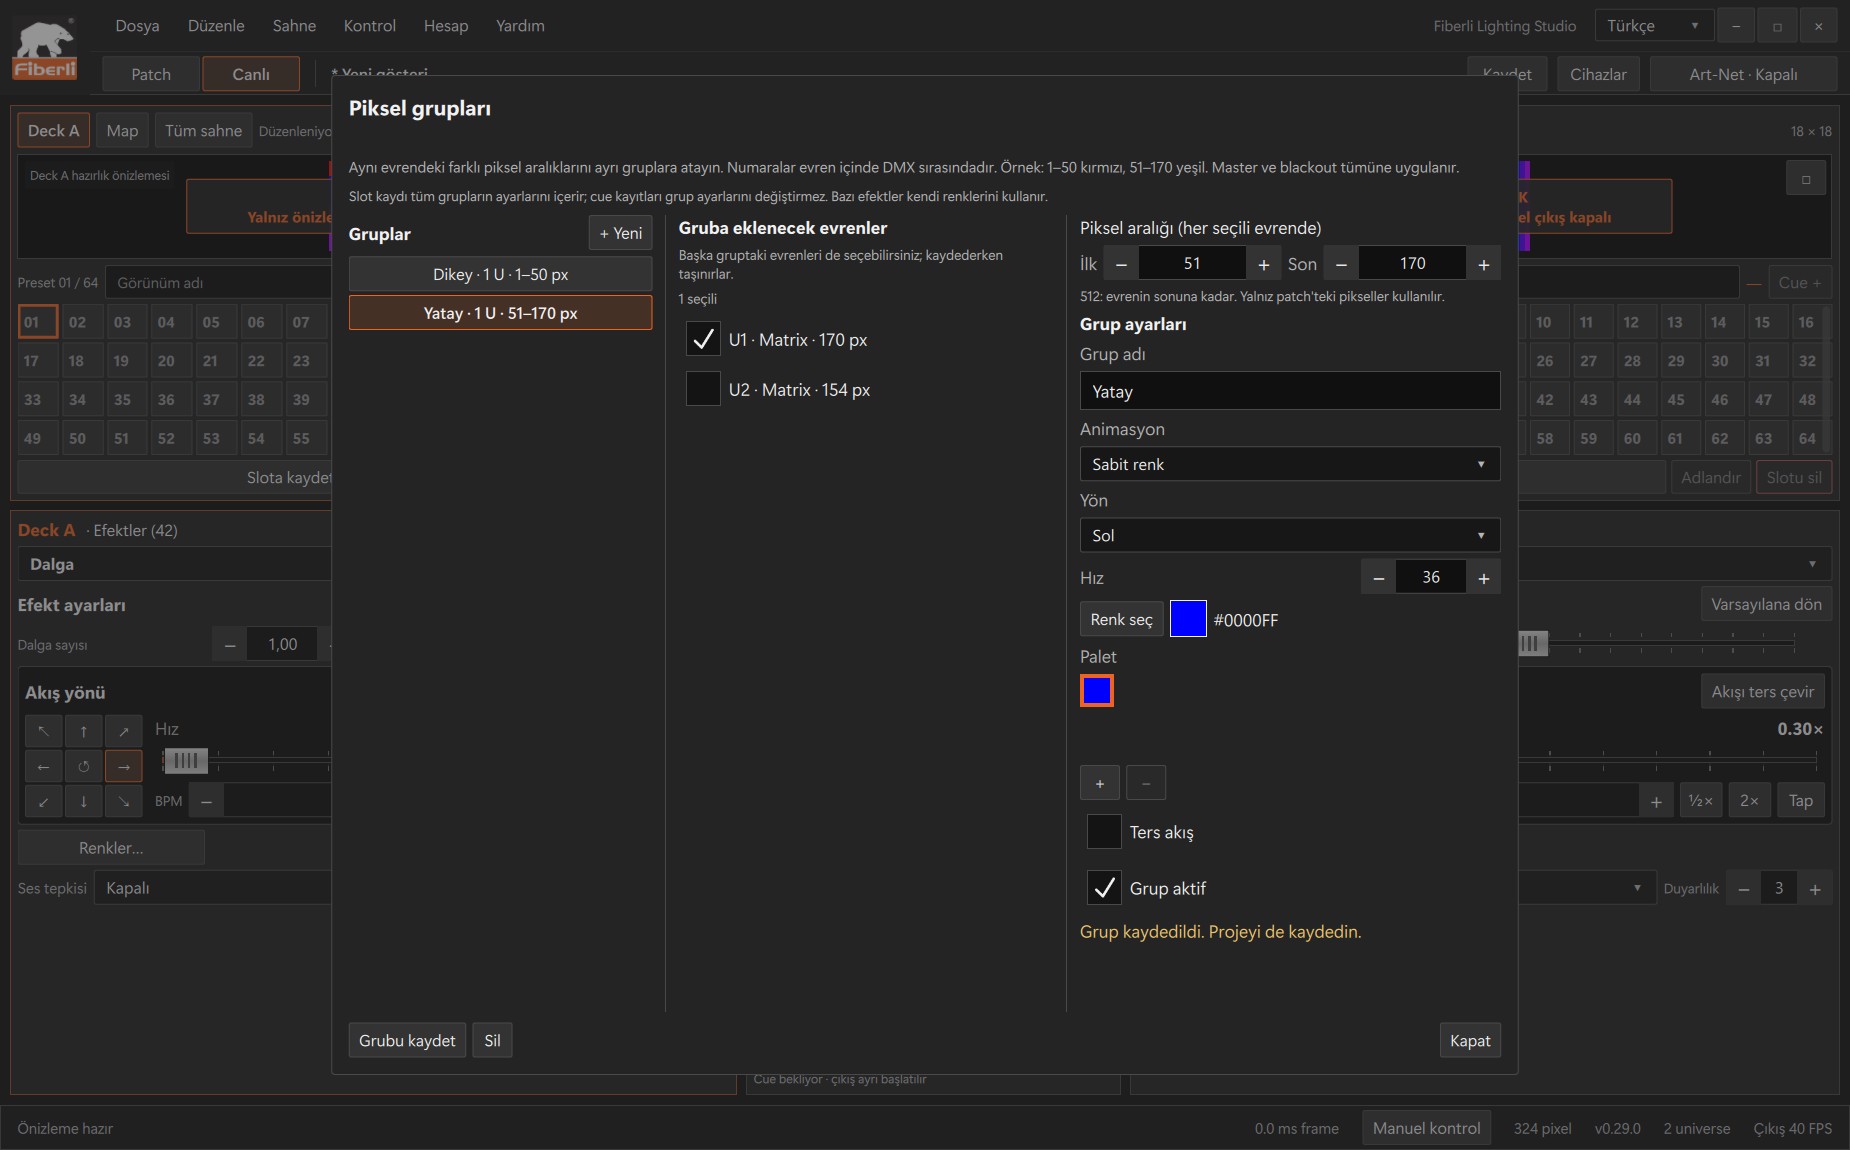
Groups window: universe membership and First/Last pixel range fields. Open the image to view it at full size. Add your actual test node as described in the device guide. Map one physical port to project universe 1 and the corresponding output universe on the node. Keep output disabled for now.
Create ranges 1–50 and 51–170 as described in the grouping guide. Use Deck A Map to assign red to the first group and green to the second, then save to slot 1 in bank A.
On Deck A, use Whole scene to remove the grouped look and prepare a blue Solid color look. Save it to slot 2. In Timeline, add one 10-second segment for A1 and another for A2, each with a 1-second transition.
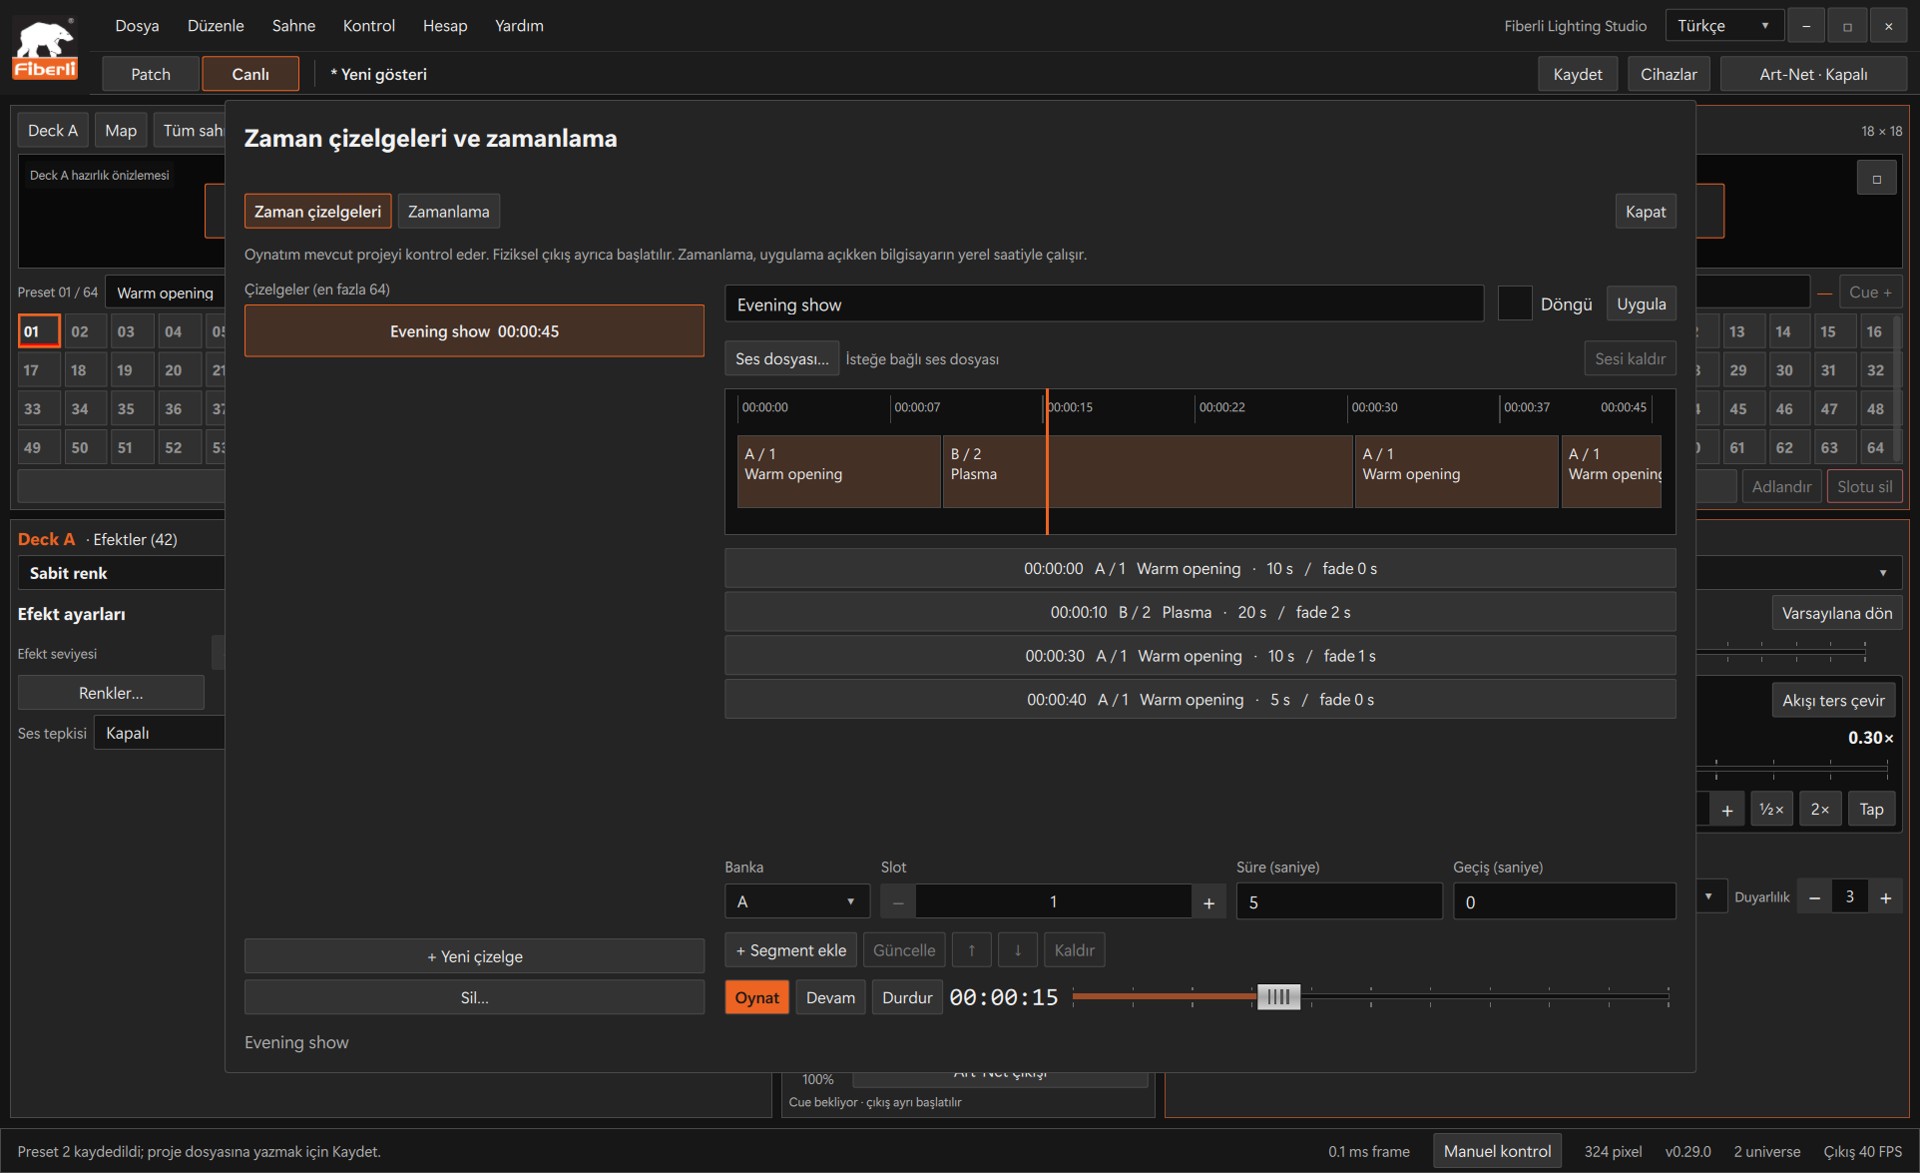
Timeline: sequential slot segments, duration, transitions and playback controls. Open the image to view it at full size. Preview the 20-second timeline. Check that the first segment shows the two group colours and the second shows blue across the entire scene. Create a one-time schedule for the near future and test it with output disabled. Save the project and follow the live output guide for the installation test.
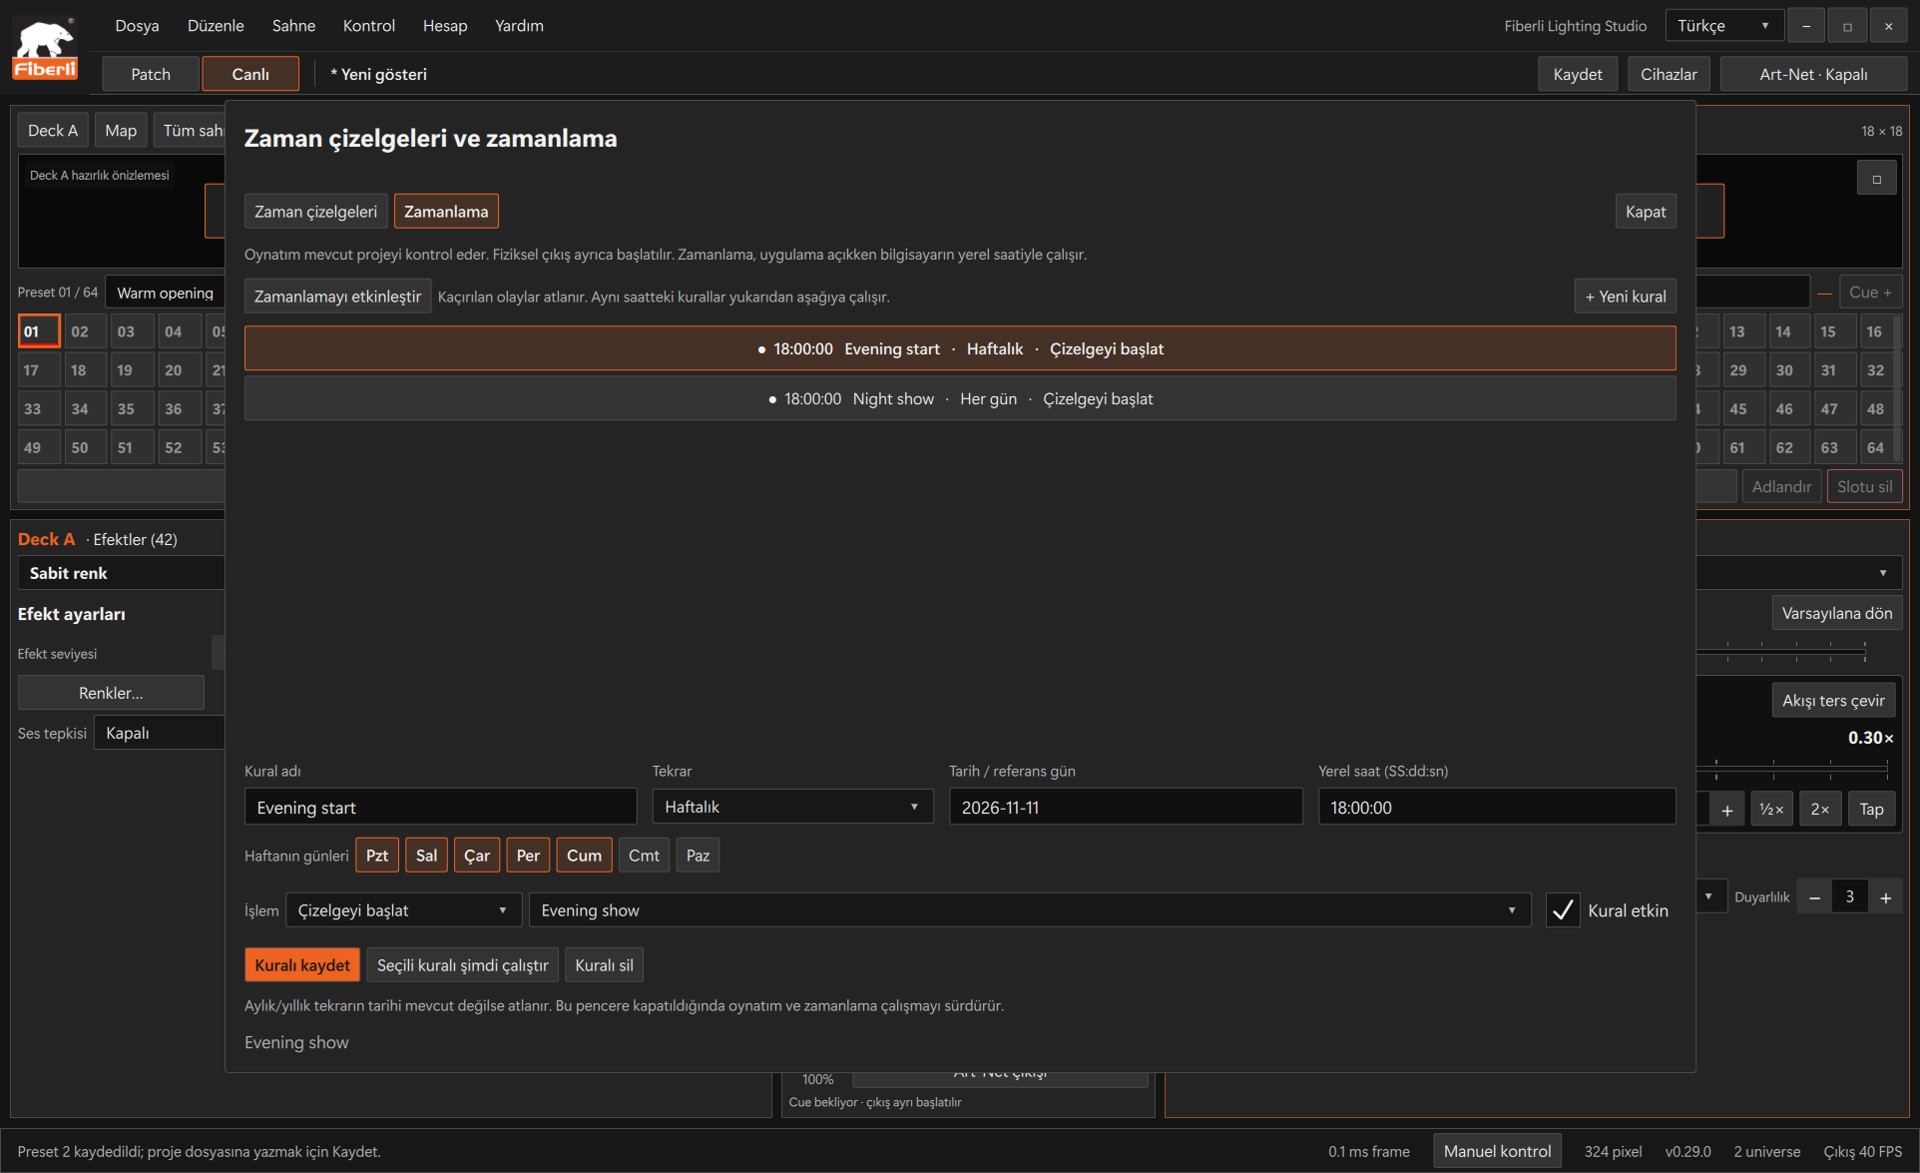
Scheduling: repeat type, date/time, action, rule and master enable control. Open the image to view it at full size.
Expected result
You have a saved 20-second timeline with two different looks and a tested calendar rule.
Common mistakes and things to check
The example addresses and port mappings must match your actual node. Completing this exercise in preview does not verify physical LED operation.
These are screenshots of the actual application. Images are from Windows Studio 0.29.0; the Help screen is from 0.30.1. The screenshots show the Turkish interface. Physical output is disabled in the examples.