
Preparing the network connection
Connect the computer and node through the correct Ethernet network.
Prerequisite: You need to know the node’s IP address and the installation’s network plan.
Step-by-step instructions
Connect the computer and Art-Net node through an Ethernet switch. Check the node’s power and link indicators.
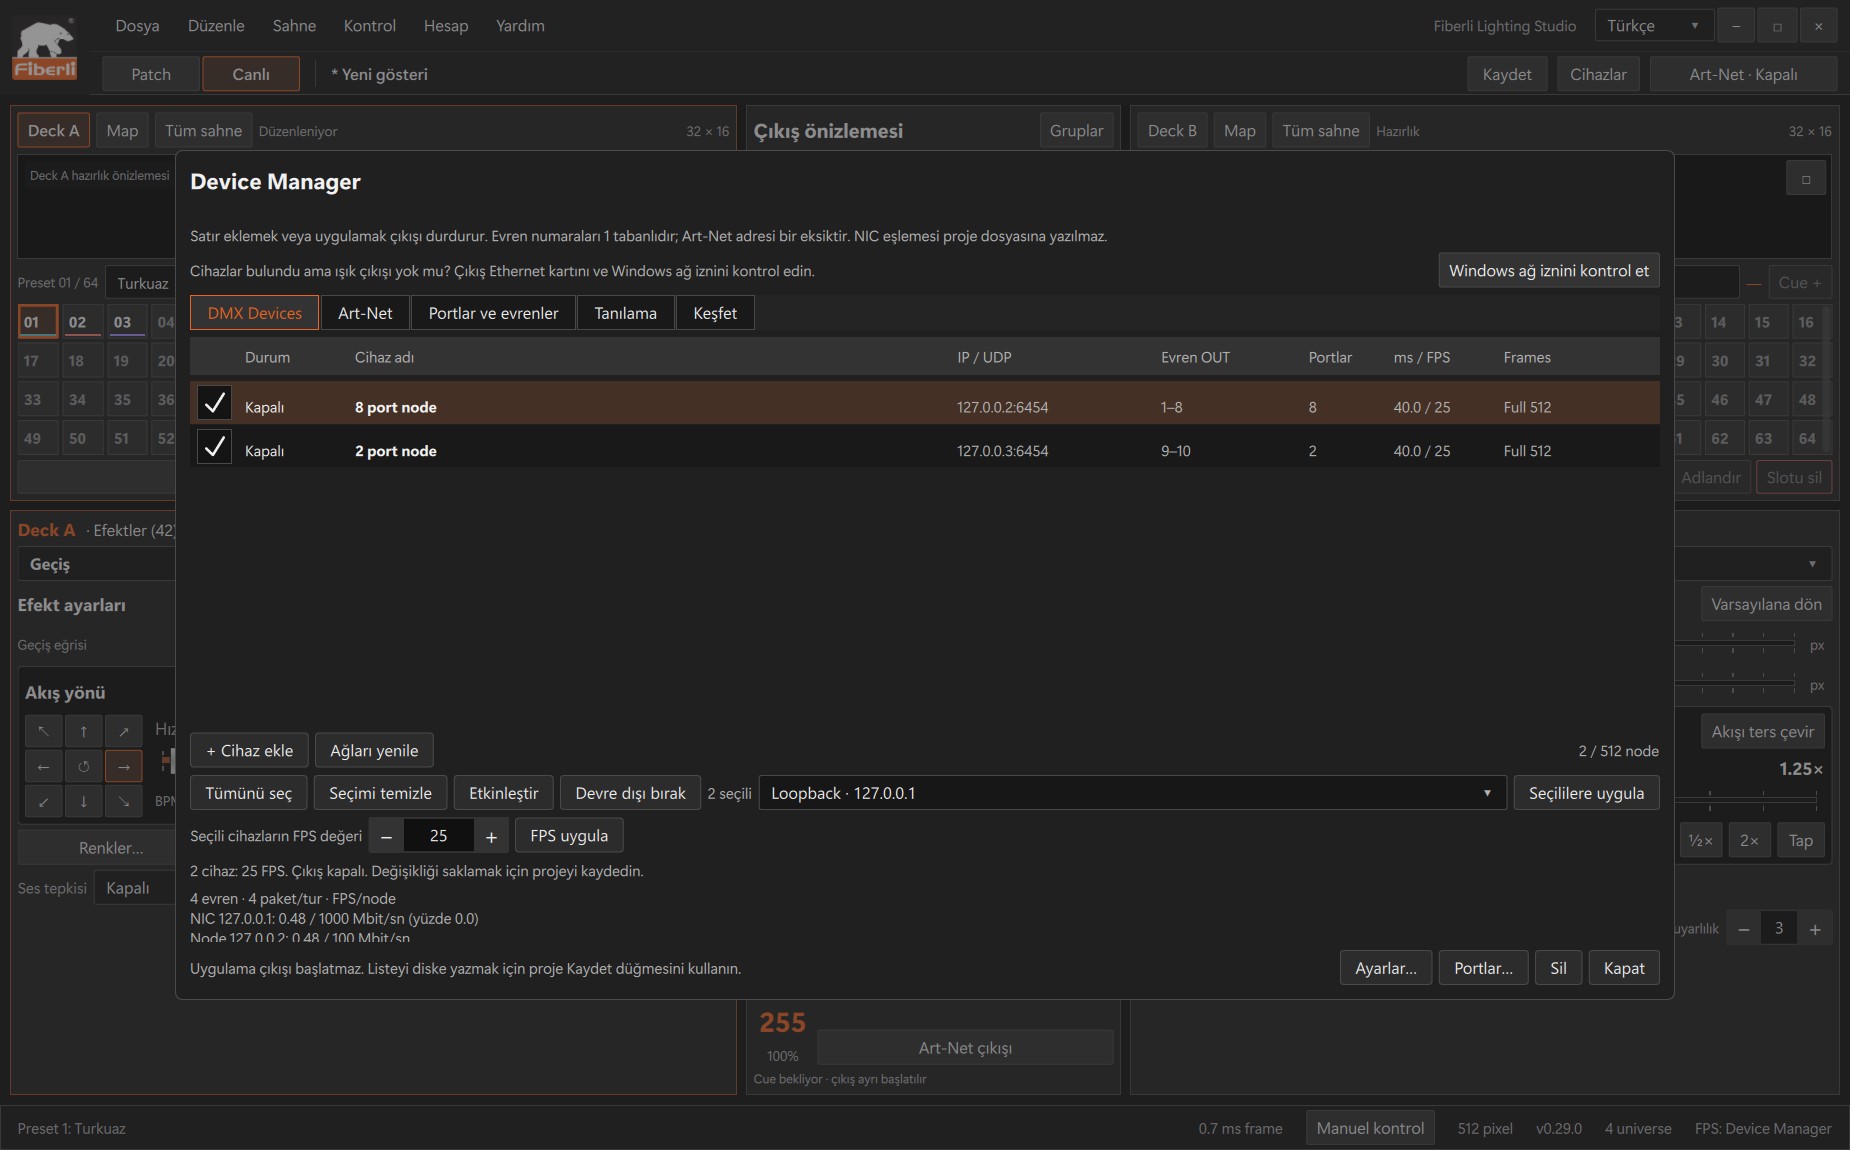
Device Manager: device rows, IP/universe details and bulk NIC/FPS controls. Open the image to view it at full size. Set the Windows Ethernet IPv4 address according to the installation’s network plan. For example, the computer could use 192.168.10.10/24 and the node 192.168.10.50/24. Check your existing network before applying these example addresses.
In Studio, open Device Manager using Devices or F4. Select the Ethernet adapter connected to the node by cable as the source NIC.
Verify that the automatically selected adapter is correct. Make sure a VPN, virtual adapter or Wi-Fi connection on another network has not been selected.
If the device is discovered but there is no output, follow the steps under Check Windows network permissions. Keep the firewall enabled and check the network permissions required by Studio.
Expected result
The correct physical network reaches the node, and the correct source Ethernet adapter is selected in Studio.
Common mistakes and things to check
Seeing a device in discovery does not confirm that data reaches the LEDs. Duplicate IP addresses and an incorrect subnet can prevent communication.
These are screenshots of the actual application. Images are from Windows Studio 0.29.0; the Help screen is from 0.30.1. The screenshots show the Turkish interface. Physical output is disabled in the examples.