
Adding and editing devices
Define the node, its physical ports and the output destination.
Prerequisite: Have the node’s IP address, port count and universe plan ready. Physical output must be disabled.
Ready-to-use example projects
Download the file. In Studio, use File → Open to open it. If you download the ZIP, extract it to a folder first. Requires Windows Studio 0.29.0 or later. No external media files are needed.
- A/B effects — download .psl
32 × 16 RGB. A1 Rainbow, A2 Plasma, A3 Wave; B1 Turquoise, B2 Chase.
The example nodes are disabled and use loopback addresses. In the scheduling example, the master switch and all rules are disabled. Use Save As to keep your own experiments.
Step-by-step instructions
Open Device Manager using Devices or F4. Press the button to add a new device.
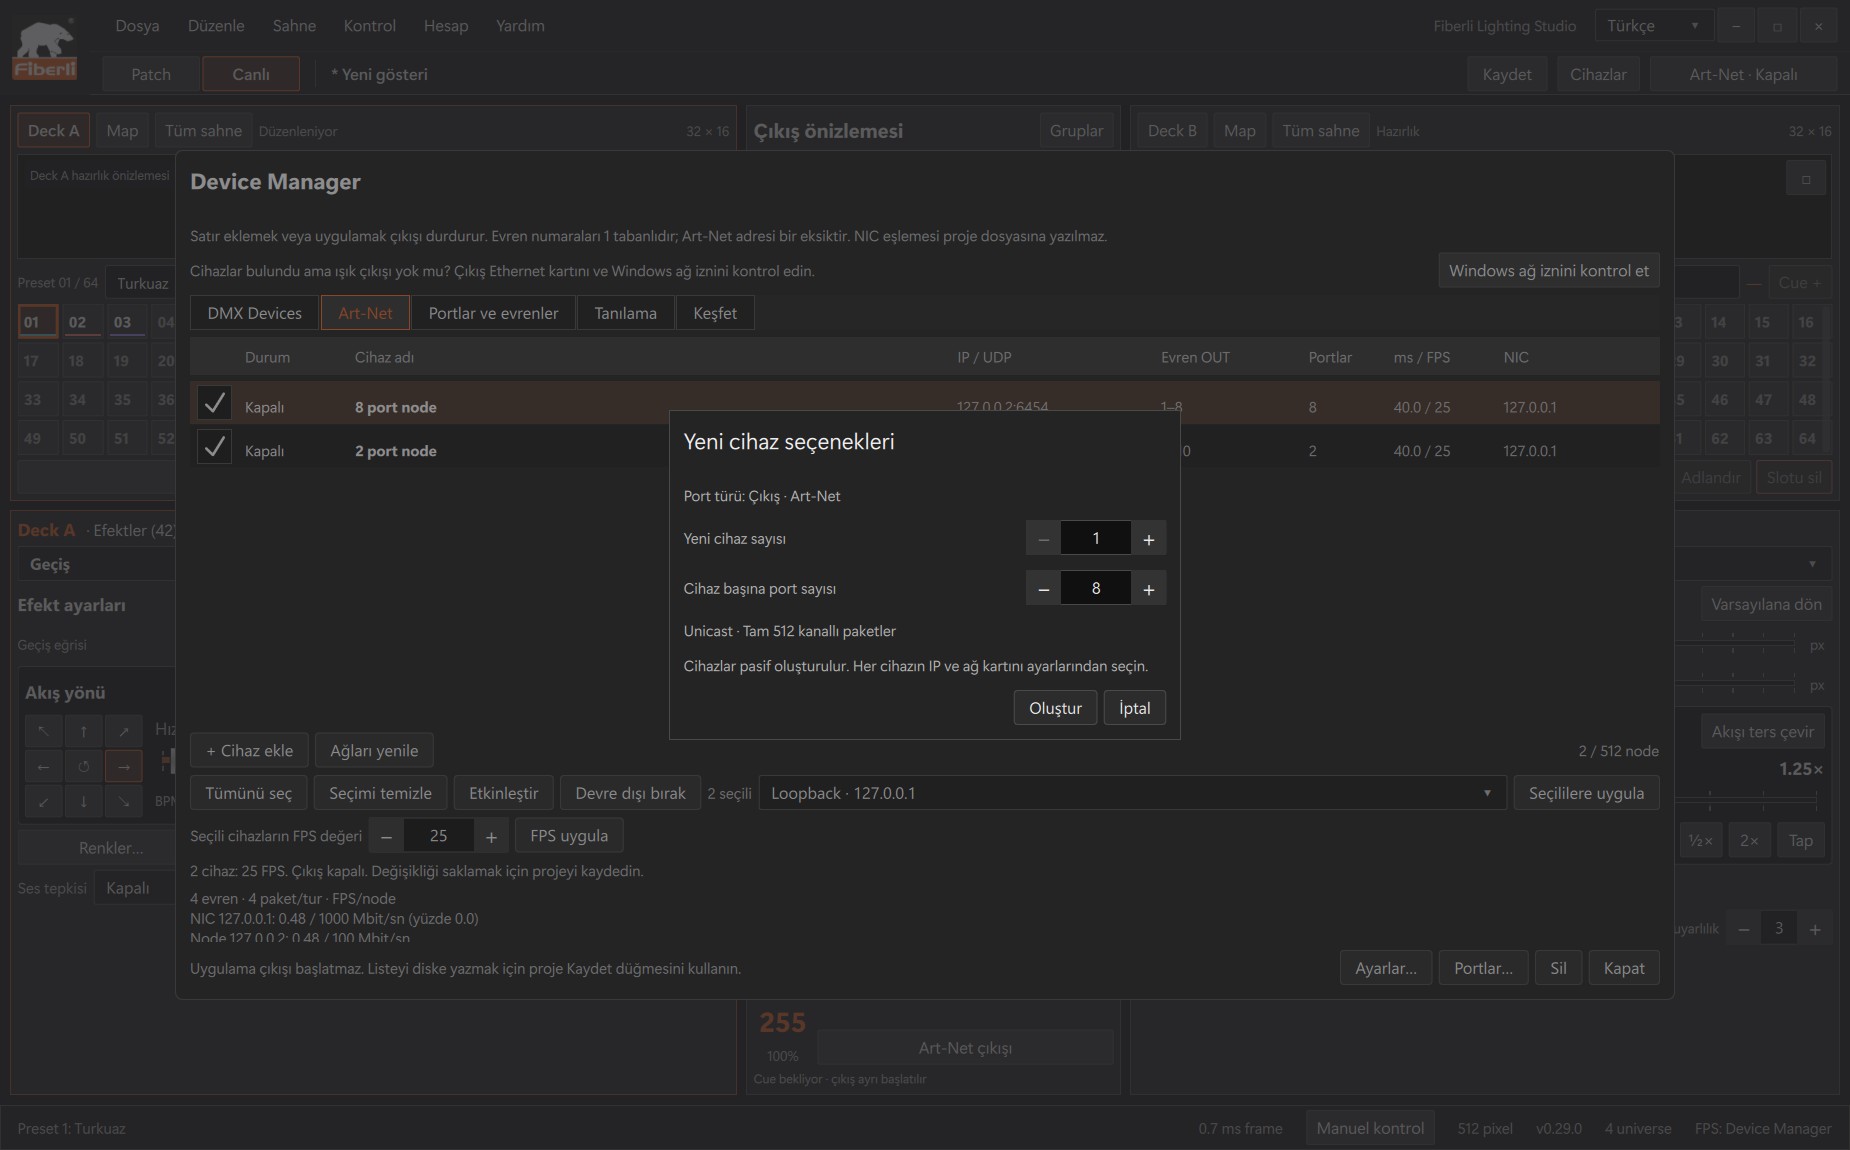
New device options: number of devices and physical ports per device. Open the image to view it at full size. Enter the number of devices and the actual physical port count per device. For one NODE8X, for example, select 1 device and 8 ports, then press Create.
Select the new row and open Settings. Check the descriptive name, actual node IPv4 address, source Ethernet adapter and UDP port 6454.
Set the first and last universes and the node’s actual line speed, then press Apply target. Replace any newly created example or loopback address with the actual hardware address.
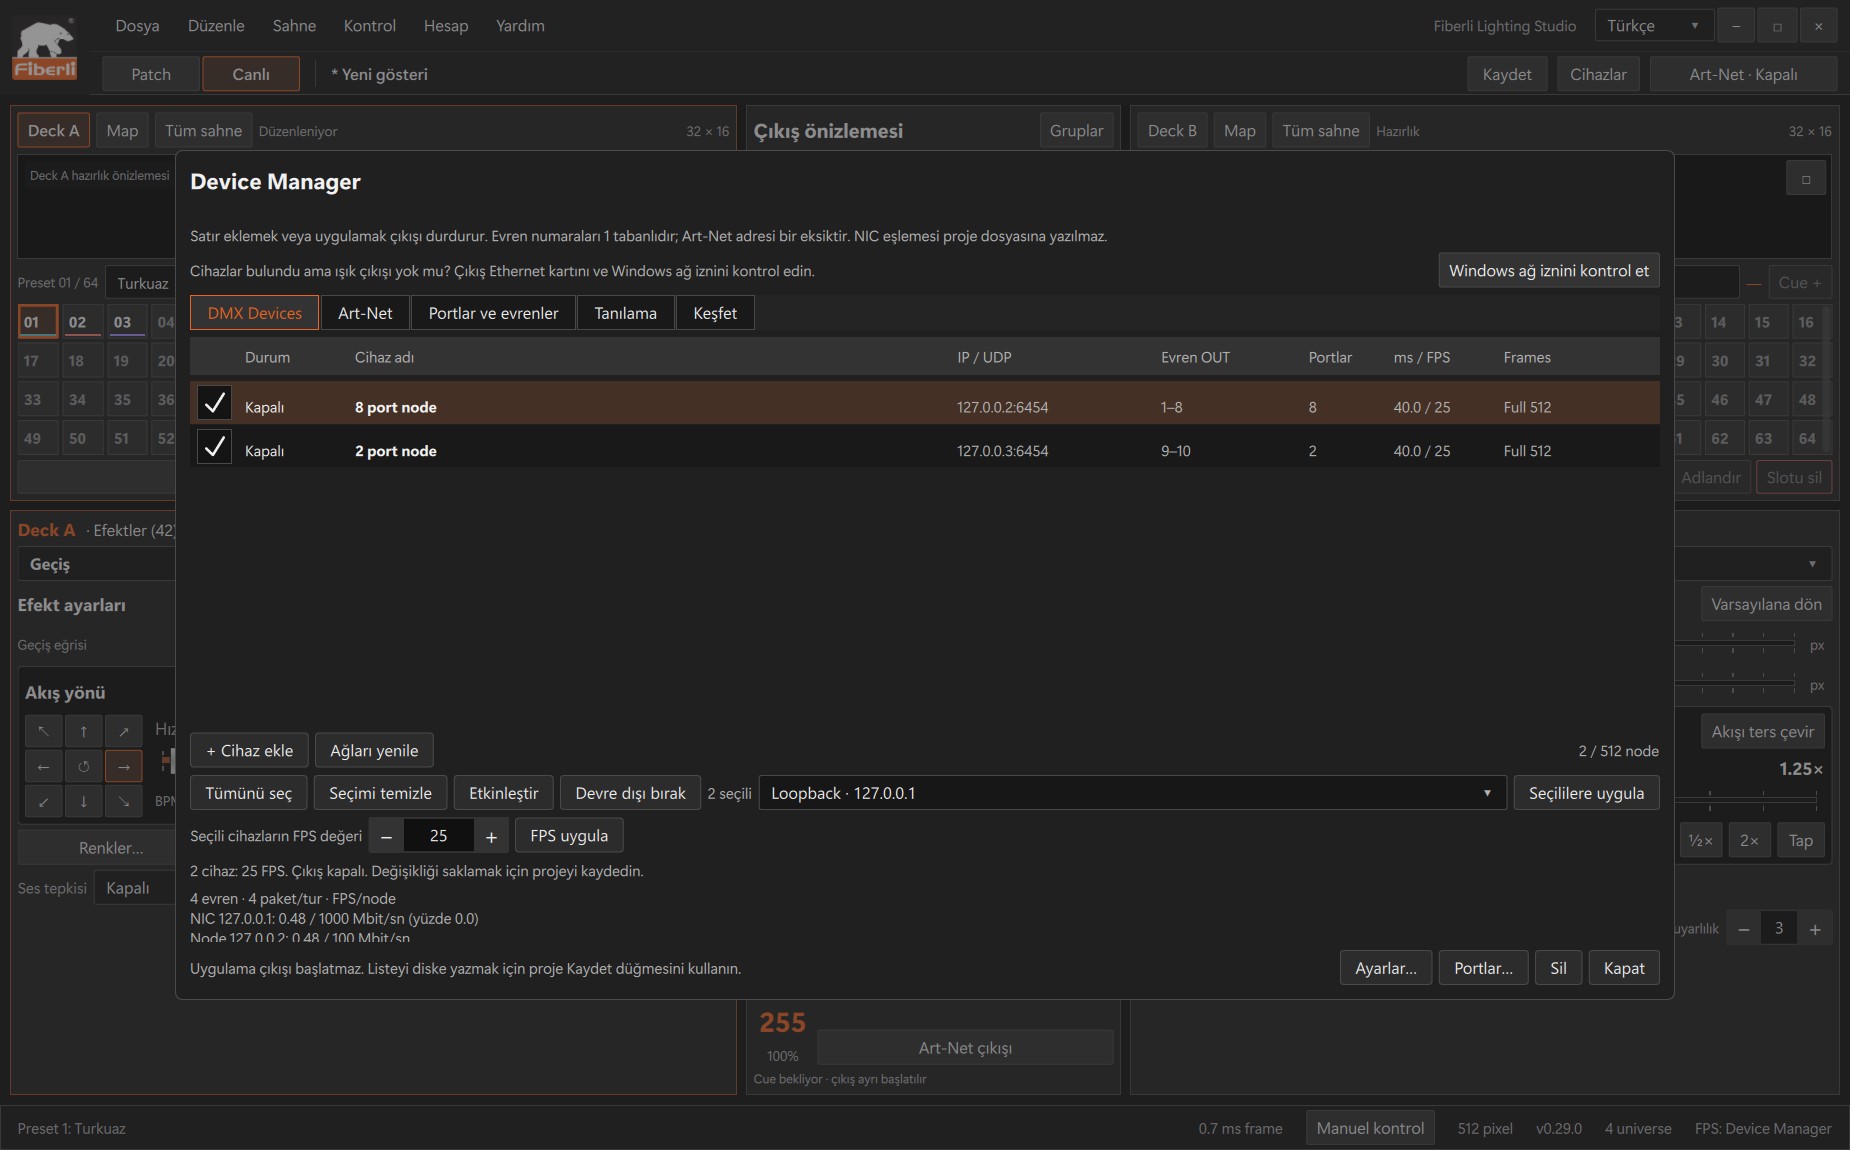
Device Manager: device rows, IP/universe details and bulk NIC/FPS controls. Open the image to view it at full size. On the Ports and universes tab, check each port’s Project universe and Output universe mapping, then press Apply port mapping. Enable the device row and save the project.
Expected result
The device list shows a node with the correct IP address, ports, universes and FPS.
Common mistakes and things to check
The physical port count is not the UDP port number. Studio does not configure the node’s own web settings; the hardware’s universe settings must also match.
These are screenshots of the actual application. Images are from Windows Studio 0.29.0; the Help screen is from 0.30.1. The screenshots show the Turkish interface. Physical output is disabled in the examples.