
Live playback and physical output
Move from preview to output on a real node in a controlled way.
Prerequisite: A valid licence, a validated Patch and enabled node/NIC mappings.
Step-by-step instructions
In Live, recall a slot or play an effect. Check that the output preview shows the look you want.
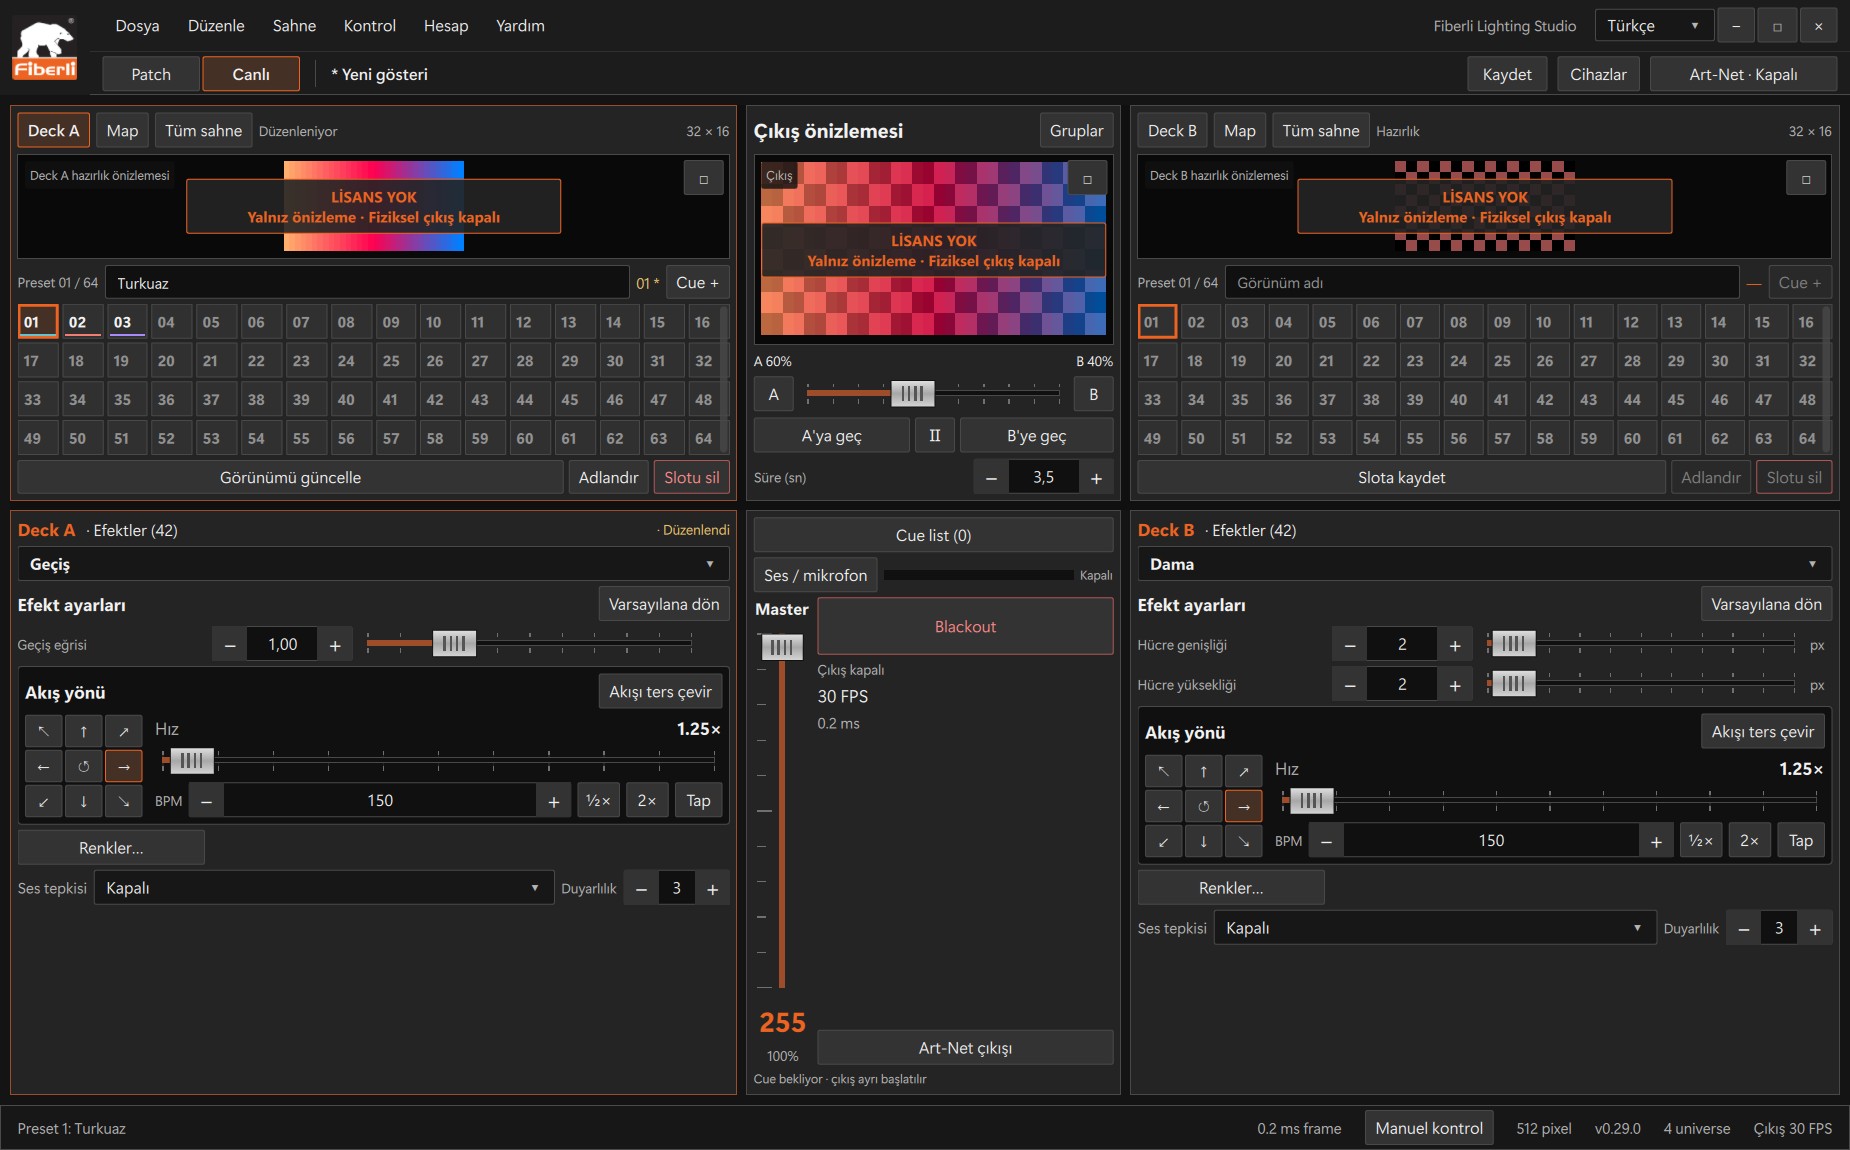
Live workspace: A/B decks, slots, output preview, Master and Blackout. Open the image to view it at full size. Set Master to an appropriate level and check the Blackout state. Let people at the installation know before starting a test.
In Devices, make a final check of the actual destination IP, source Ethernet adapter, port/universe mappings and enabled devices.
Open the Art-Net output controls and press Start output. Resolve any licence, network or patch warnings before continuing.
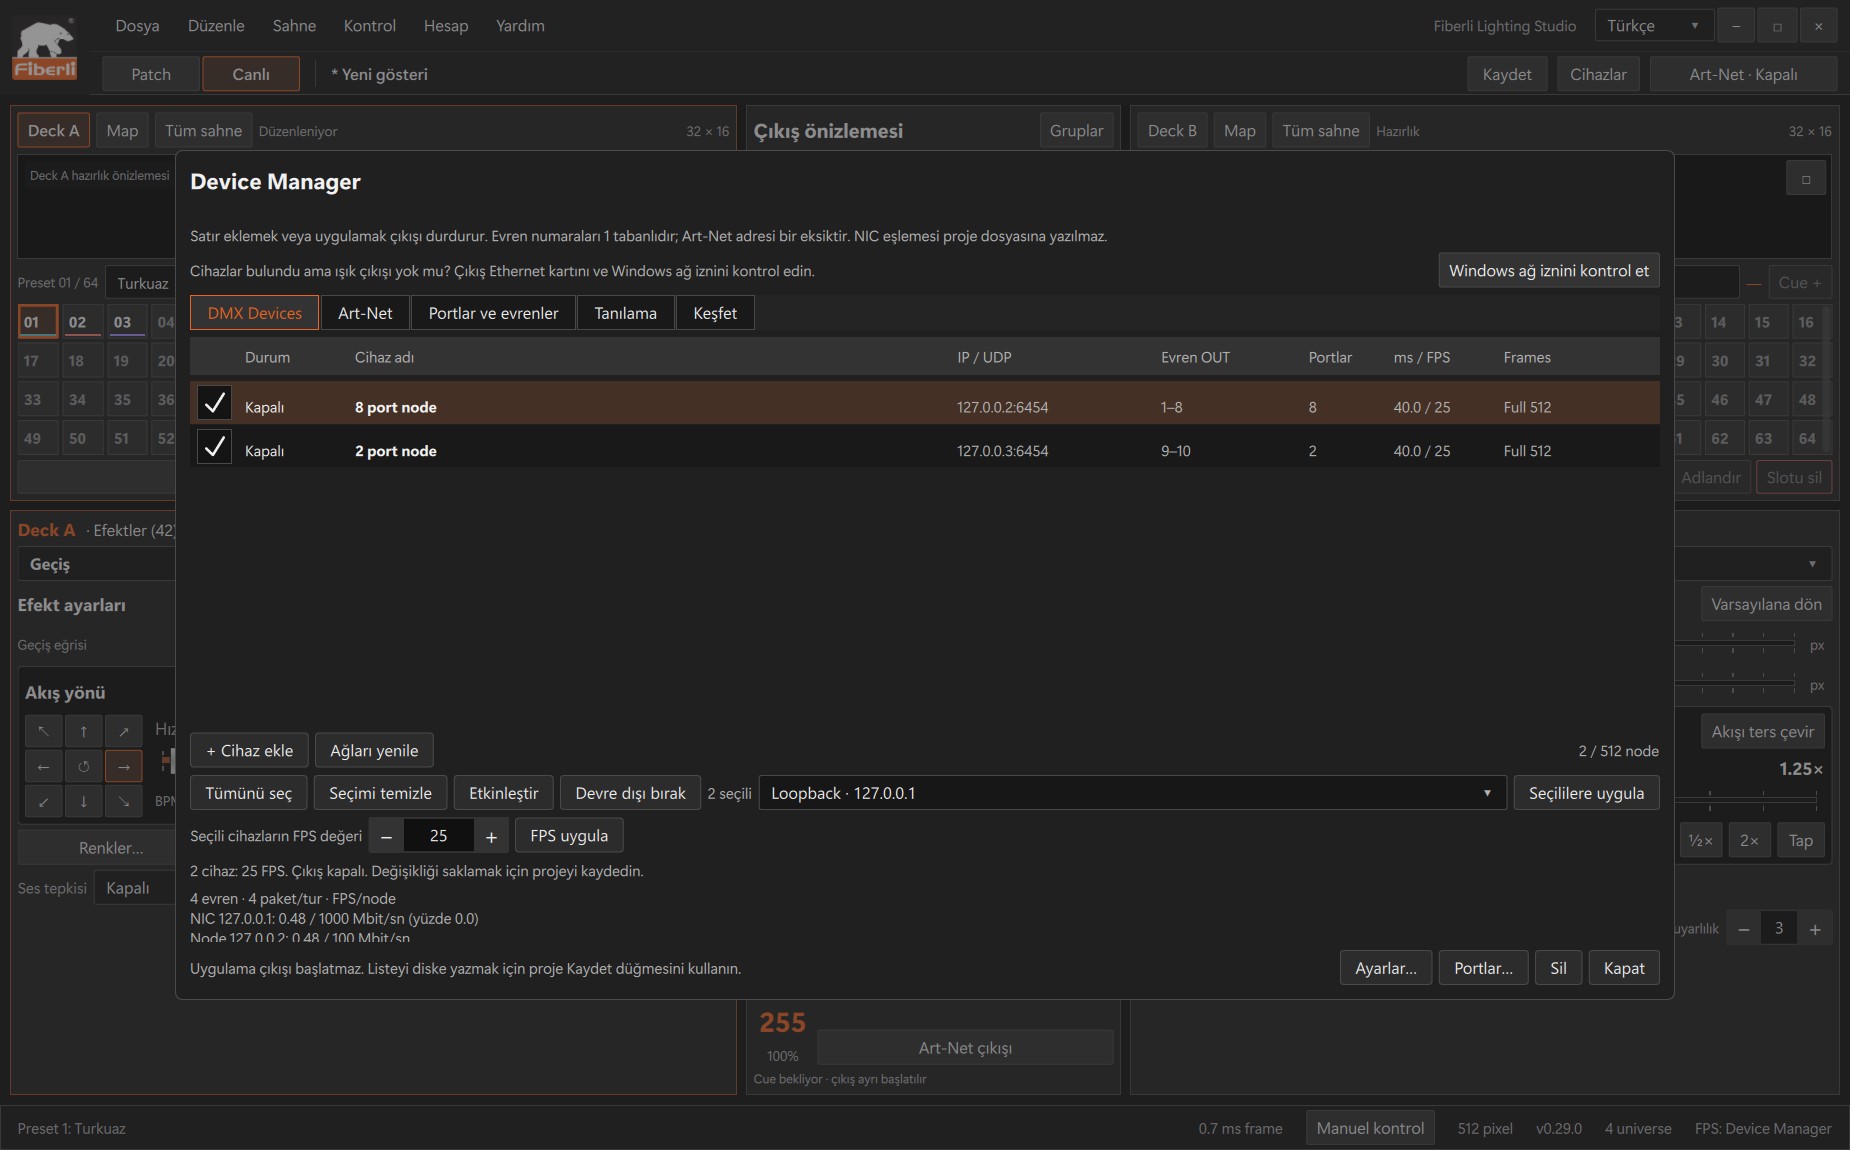
Device Manager: device rows, IP/universe details and bulk NIC/FPS controls. Open the image to view it at full size. Check the first and last pixels, colours and direction on the physical LEDs. Blackout sends zero values; use Stop output to end transmission.
Expected result
Studio shows the sending status, and you can verify the look on the correctly mapped physical LEDs.
Common mistakes and things to check
The UDP packet counter is not a delivery acknowledgement. Stopping playback, enabling Blackout and stopping network output are different actions.
These are screenshots of the actual application. Images are from Windows Studio 0.29.0; the Help screen is from 0.30.1. The screenshots show the Turkish interface. Physical output is disabled in the examples.