
FPS and performance settings
Change the output rate for selected devices together.
Prerequisite: Studio 0.27.0 or later, with a prepared device list.
Step-by-step instructions
Open Device Manager. Use the row checkboxes to select the devices whose FPS you want to change; use Select all to include every device.
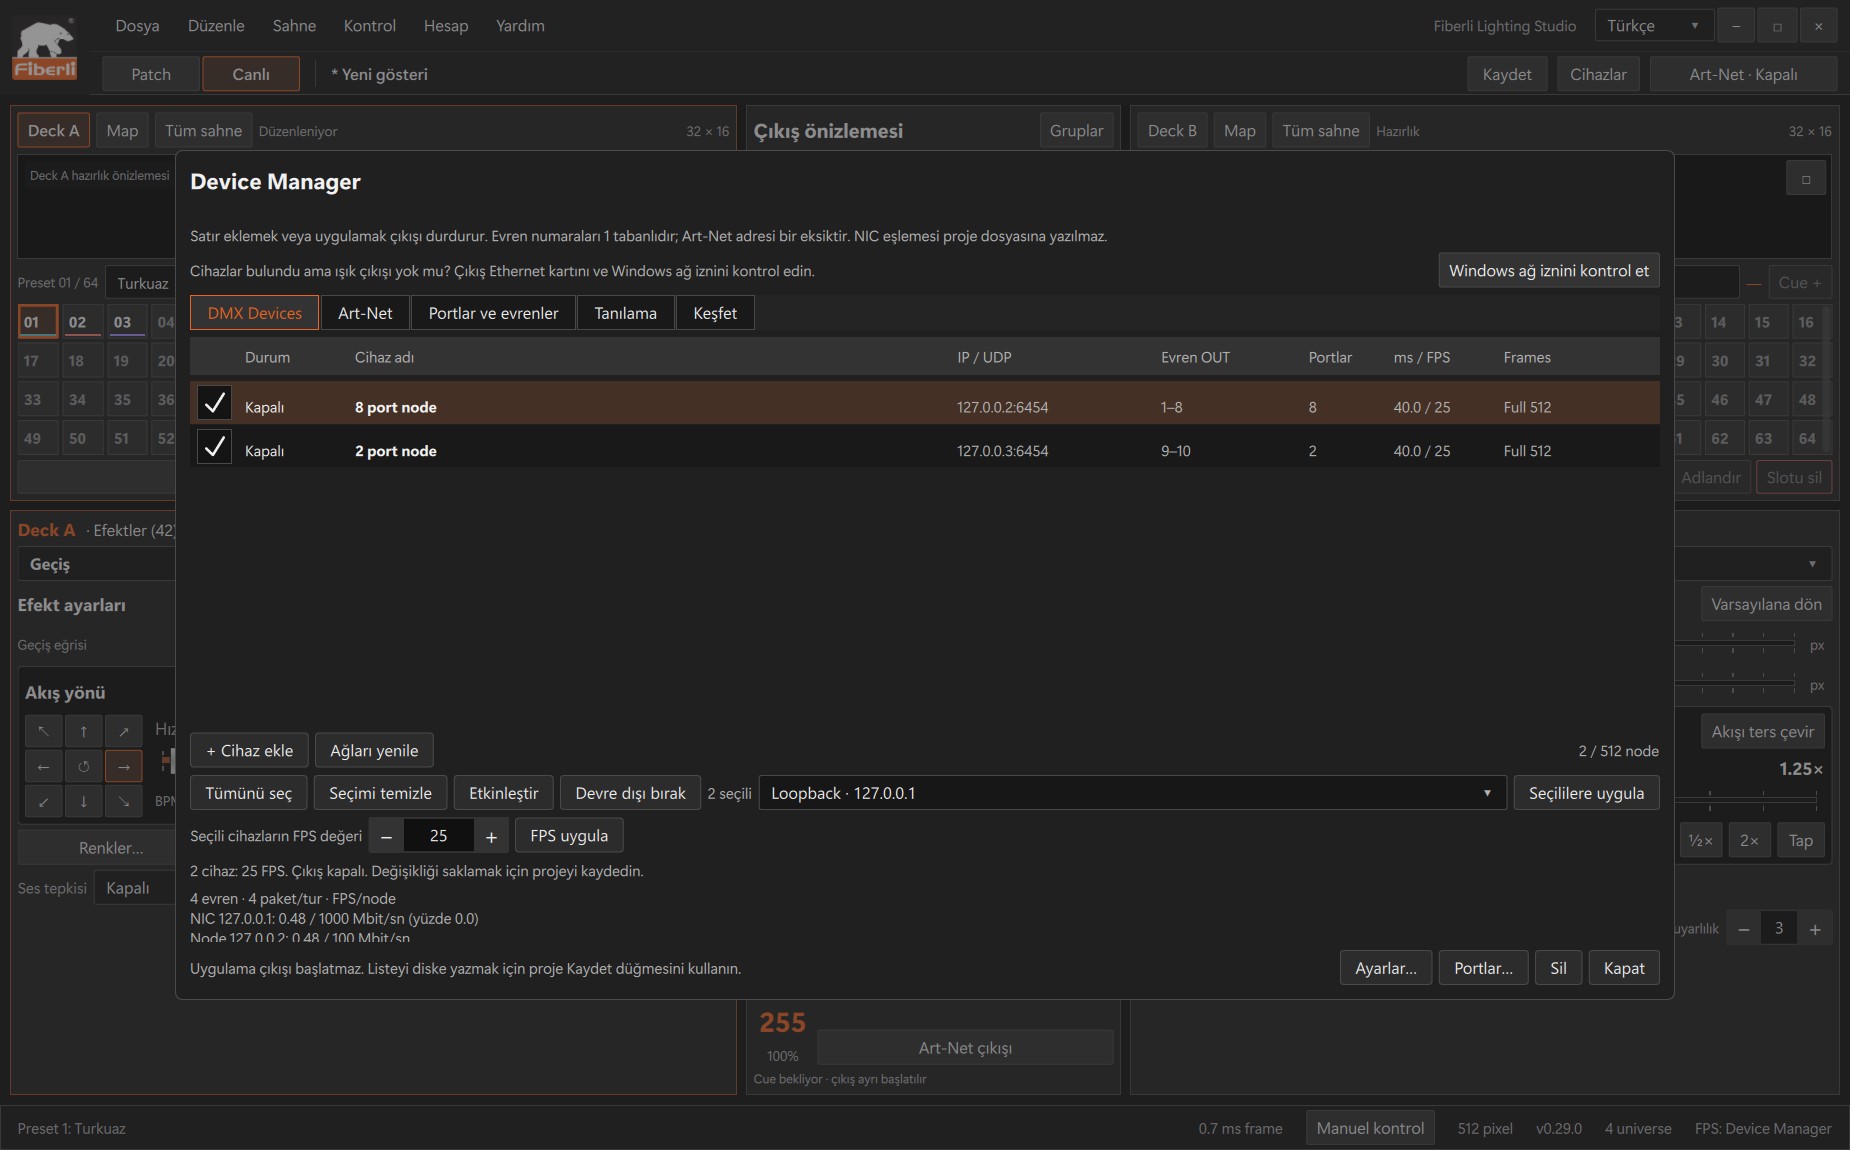
Device Manager: device rows, IP/universe details and bulk NIC/FPS controls. Open the image to view it at full size. Enter a value from 10 to 40 in the bulk FPS field, for example 25 FPS.
Press Apply FPS. Check that the selected devices show the new value in the table.
Changing the value stops physical output. Check the new network load before restarting output if needed, then save the project.
To change only the interface’s preview smoothness, use Control > Preview performance…. This setting is separate from the node’s output FPS.
Expected result
The selected devices use the same configured FPS value; unselected devices keep their settings.
Common mistakes and things to check
The table shows the target FPS, not a measured LED refresh rate. Check network capacity and node performance separately.
These are screenshots of the actual application. Images are from Windows Studio 0.29.0; the Help screen is from 0.30.1. The screenshots show the Turkish interface. Physical output is disabled in the examples.