
Working with colours and effects
Prepare an animation on an A/B deck.
Prerequisite: The Patch must be ready for previewing.
Ready-to-use example projects
Download the file. In Studio, use File → Open to open it. If you download the ZIP, extract it to a folder first. Requires Windows Studio 0.29.0 or later. No external media files are needed.
- A/B effects — download .psl
32 × 16 RGB. A1 Rainbow, A2 Plasma, A3 Wave; B1 Turquoise, B2 Chase.
The example nodes are disabled and use loopback addresses. In the scheduling example, the master switch and all rules are disabled. Use Save As to keep your own experiments.
Step-by-step instructions
In the Live workspace, select Deck A or Deck B for editing.
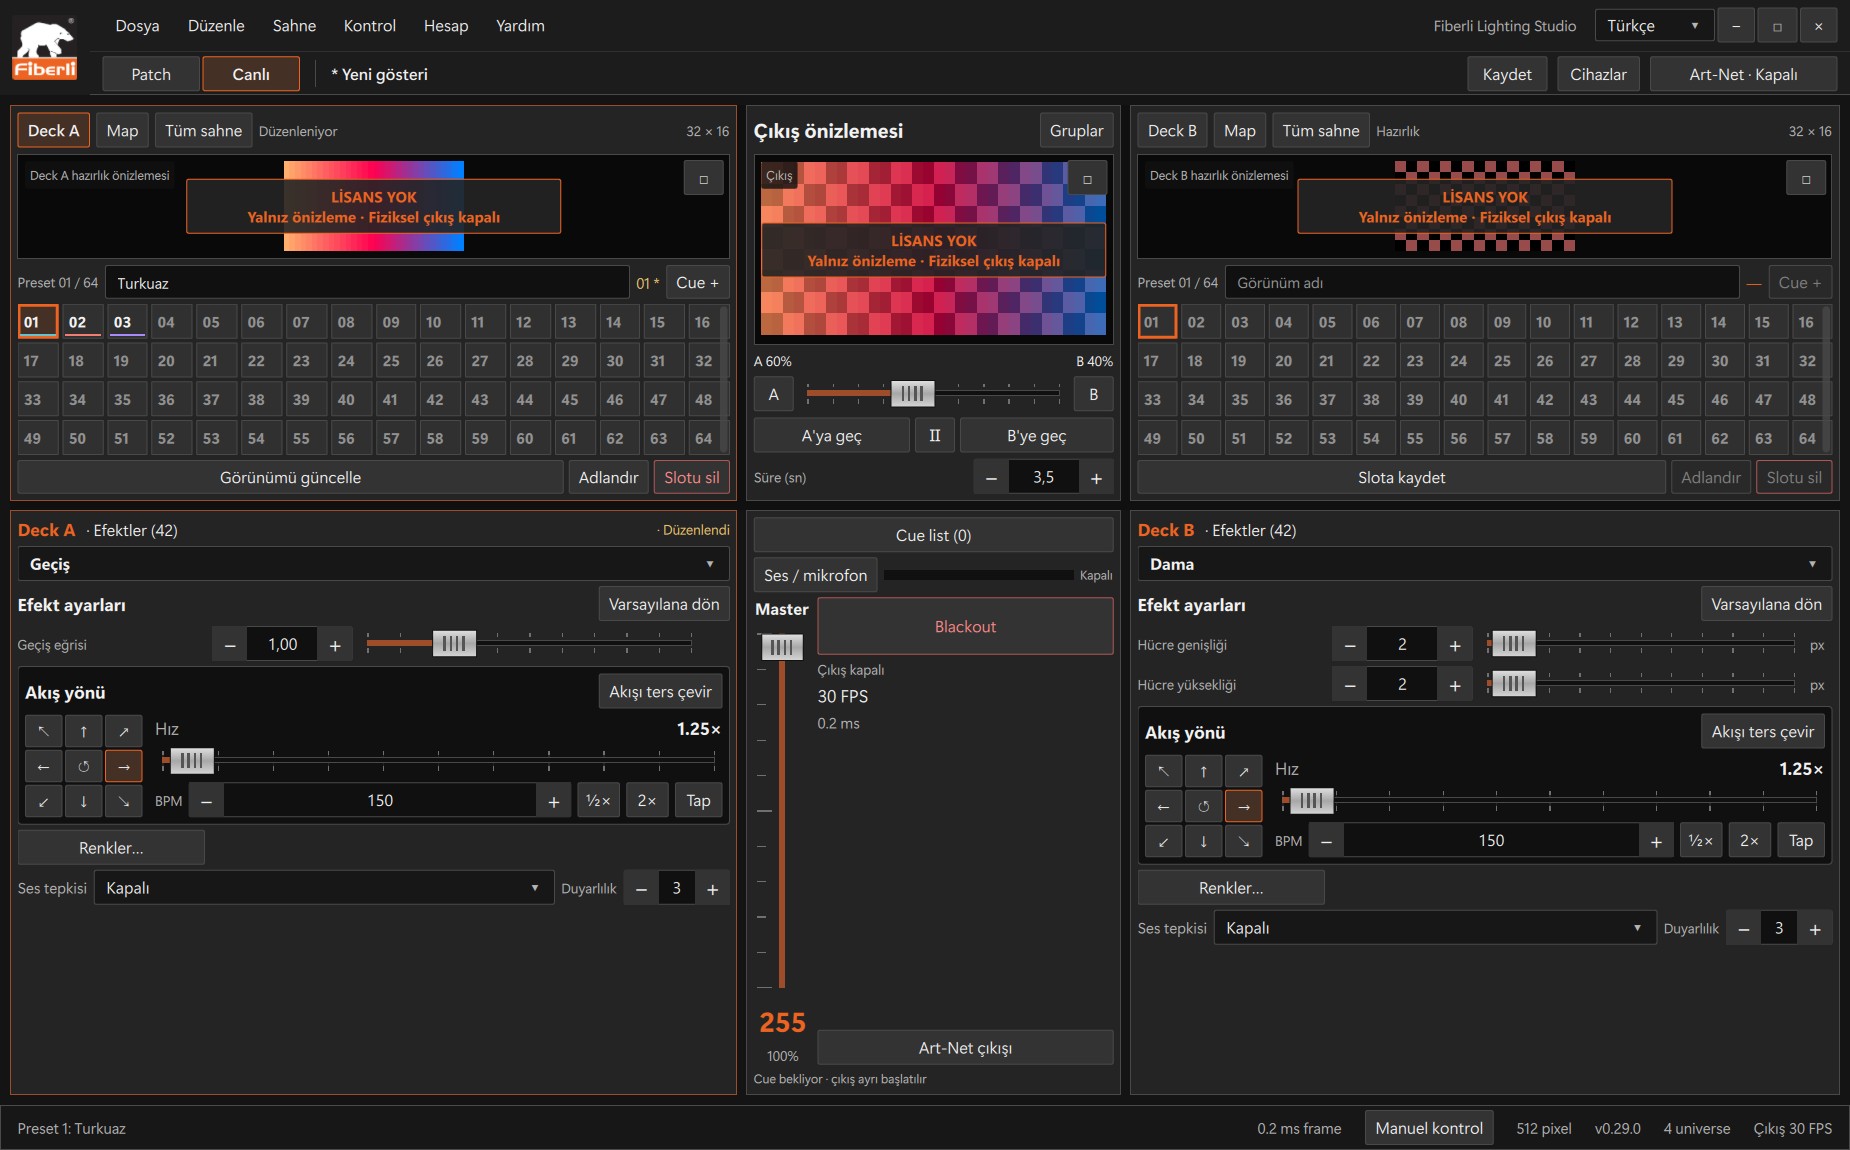
Live workspace: A/B decks, slots, output preview, Master and Blackout. Open the image to view it at full size. Choose Solid color, Rainbow or another built-in effect from the effect list. The available settings depend on the selected effect.
Use Colors… to edit the palette. For a solid colour, check the single colour; for multicolour effects, adjust the palette colours in use.
Watch the selected deck’s preview as you adjust speed/BPM, flow direction and effect-specific settings.
Move the central A/B crossfader towards the deck you prepared and check the output preview. Save the look to a slot, then press Ctrl+S to save the project.
Expected result
Your animation appears in the deck and output previews.
Common mistakes and things to check
If the crossfader stays at A while you edit Deck B, the output preview shows A. Master and Blackout affect the shared output.
These are screenshots of the actual application. Images are from Windows Studio 0.29.0; the Help screen is from 0.30.1. The screenshots show the Turkish interface. Physical output is disabled in the examples.