
Getting to know the interface
Identify the Patch and Live workspaces and the output controls.
Prerequisite: Studio must be open.
Ready-to-use example projects
Download the file. In Studio, use File → Open to open it. If you download the ZIP, extract it to a folder first. Requires Windows Studio 0.29.0 or later. No external media files are needed.
- A/B effects — download .psl
32 × 16 RGB. A1 Rainbow, A2 Plasma, A3 Wave; B1 Turquoise, B2 Chase.
The example nodes are disabled and use loopback addresses. In the scheduling example, the master switch and all rules are disabled. Use Save As to keep your own experiments.
Step-by-step instructions
Find File, Edit, Scene, Control, Account and Help in the top menu.
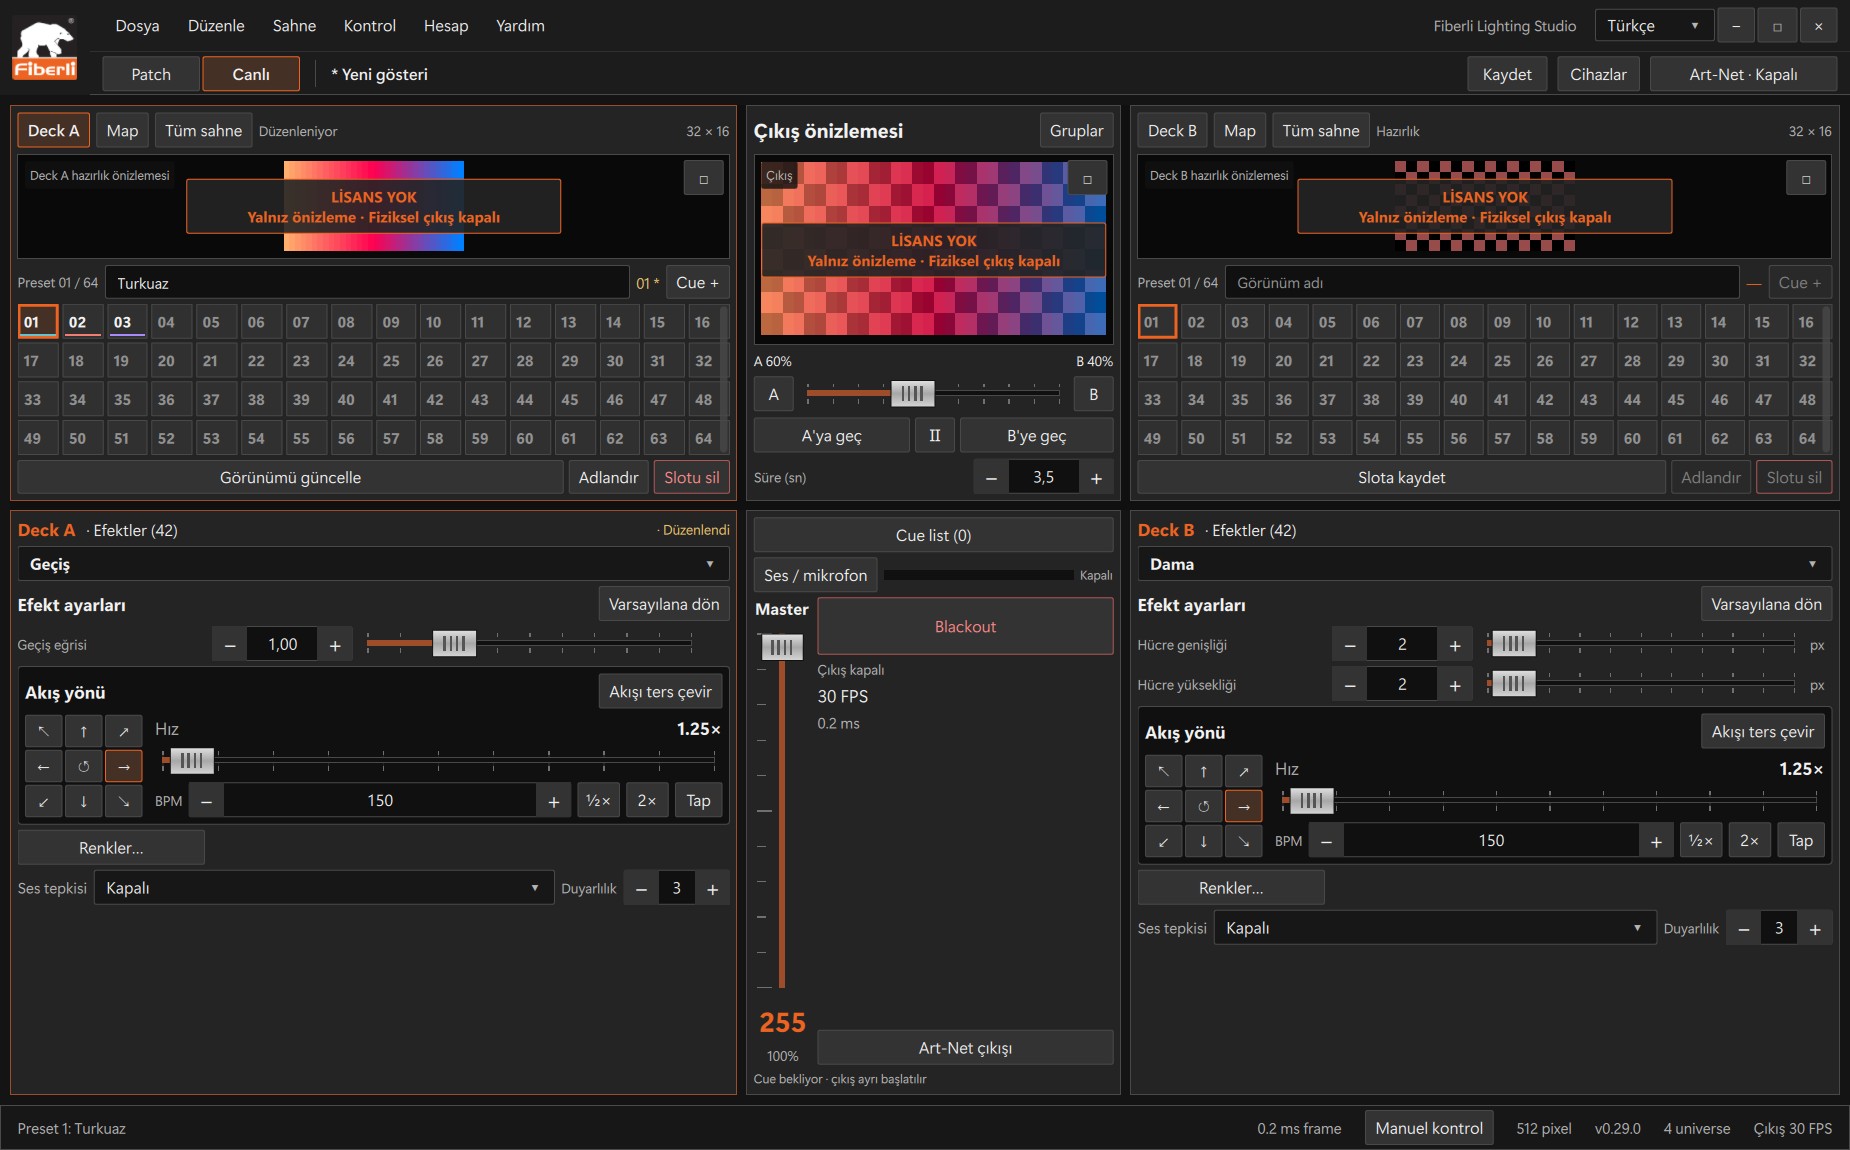
Live workspace: A/B decks, slots, output preview, Master and Blackout. Open the image to view it at full size. Switch to the Patch tab. Use this workspace to prepare the scene layout and pixel/DMX addressing.
Switch to the Live tab. Deck A on the left and Deck B on the right each have their own effects and slots.
Find the output preview and A/B crossfader in the centre. Selecting a deck determines which side you edit; the crossfader determines the output mix.
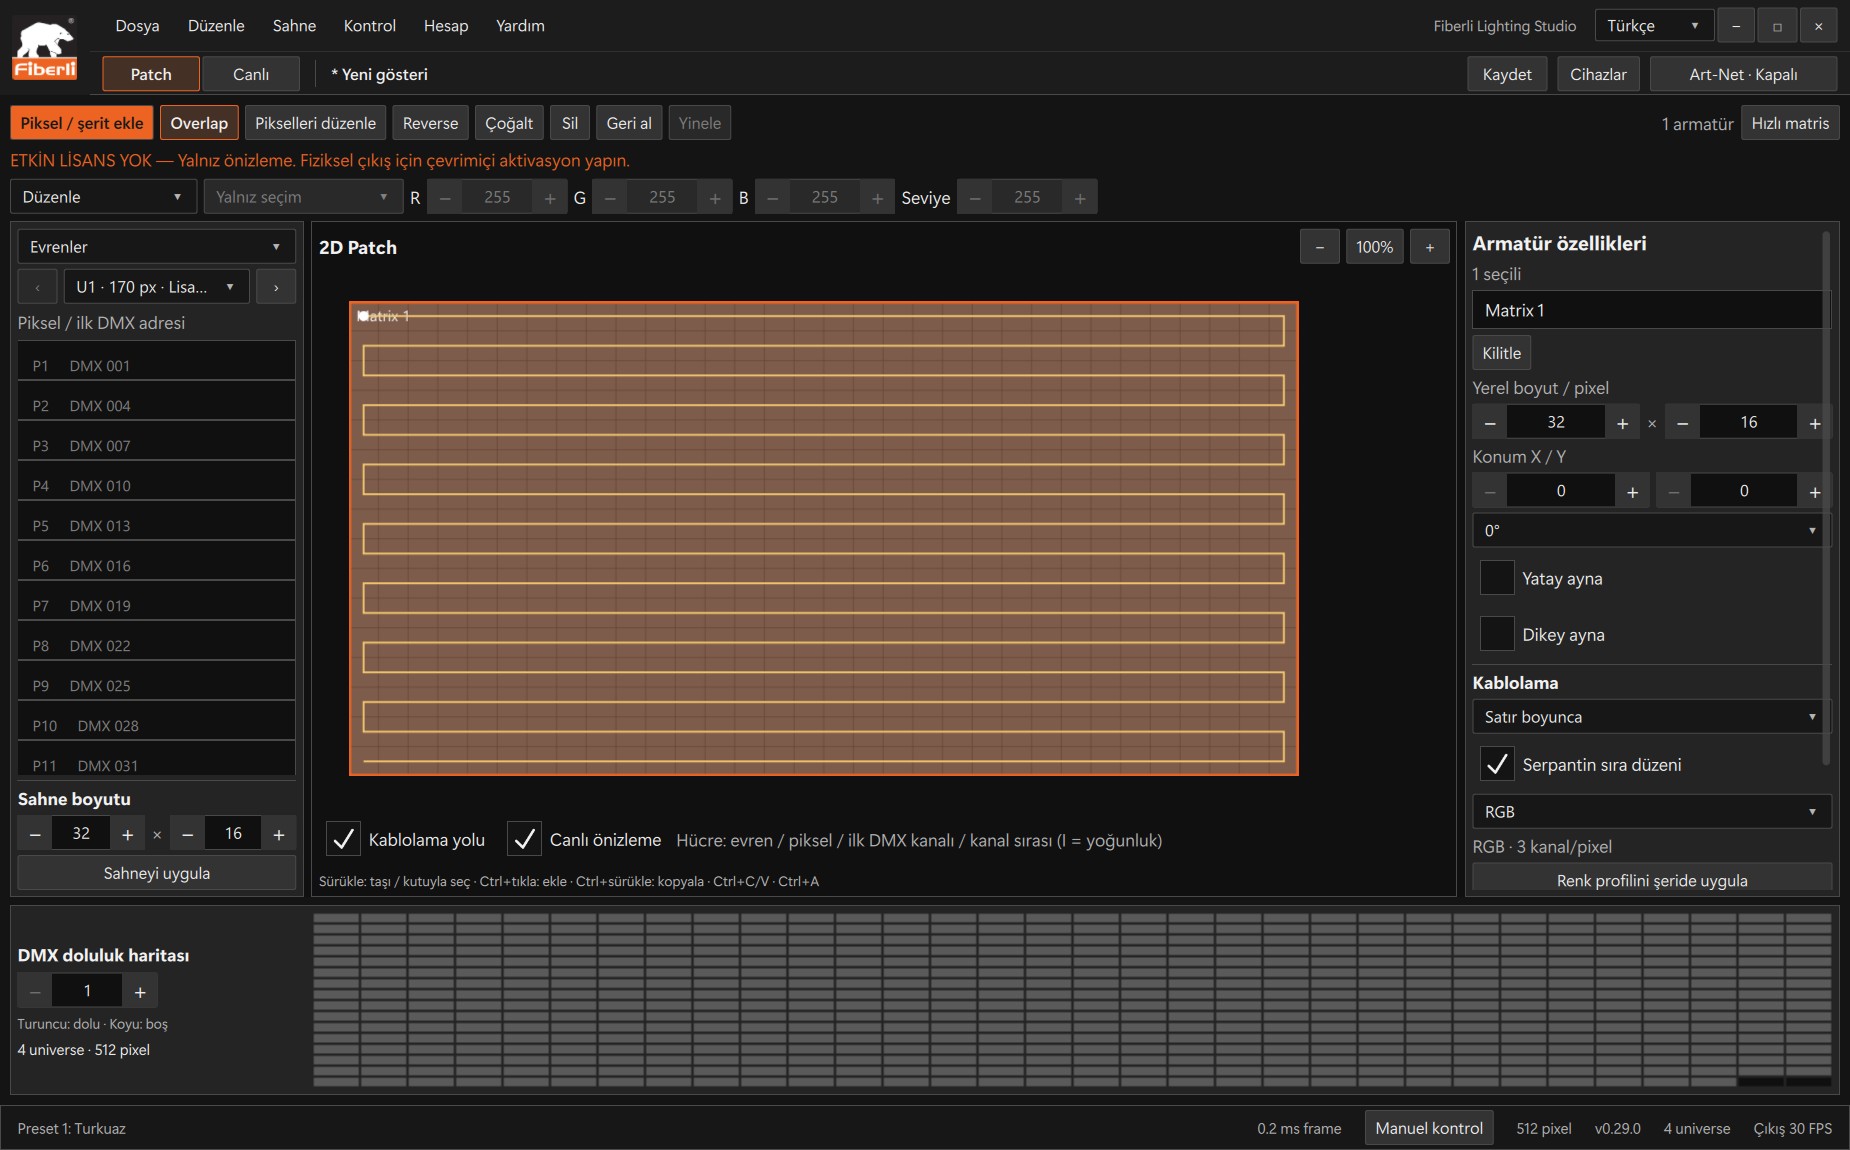
Patch workspace: fixture properties, pixel layout and DMX channel occupancy. Open the image to view it at full size. Find the Master, Blackout and Art-Net output controls. Devices at the top right opens the network and node settings.
Expected result
You can locate the controls for layout, content preparation and output.
Common mistakes and things to check
A visible preview does not mean that physical Art-Net output is enabled.
These are screenshots of the actual application. Images are from Windows Studio 0.29.0; the Help screen is from 0.30.1. The screenshots show the Turkish interface. Physical output is disabled in the examples.